Transparency and Shaped Windows
PxPlus provides a number of features that allow you to enhance the appearance of your application and allow you to create widget-like applications with a minimum of effort.
Frame/Border Control
Every window in the system can have a variety of borders around it. Dialogues and windows with a title usually have a caption line and thick border, windows with an 'empty' title has thin borders, and windows with no title have no border.
The 'OPTION'( ) mnemonic in PxPlus has a "FRAME" option that allows you to change the style of border on the fly for any window.
The valid options are:
"NONE" | The window has no border/frame. | |
"CAPTION" | The window has a border and caption line. | |
"THICK" | The window has a thick border. | |
"THIN" | The window has a thin border (usually a single pixel wide black line). |
Window Transparency
There are two types of transparency supported within PxPlus:
Full Window Transparency | Provides the ability for a window within the system to have see-through characteristics. That is, the user will be able to see the windows behind the current window. |
Transparent Masking | Provides the ability to set a colour that is used to define a transparency mask. Wherever that colour occurs in the window will be transparent and allow access to the window/screen below. |
Creating a Shaped Window
These PxPlus features provide an easy way to create windows of different shapes. Let us create a "Happy Face" window for our application.
Step 1: | Create the window to receive the "Happy Face". First, we need to create a window that we want to use. We do not want the main window because of all the menu_bar and background; therefore, we will hide it and create a Dialogue window. 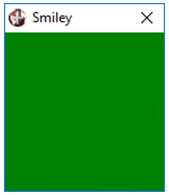 Notice that we created the window with a "GREEN" background, you'll see why later. We are also hiding the newly created Dialogue window to avoid the user seeing the logic as it draws. | |
Step 2: | Draw the "Happy Face". 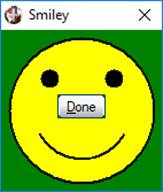 | |
Step 3: | Remove the window frame.  | |
Step 4: | Remove the background colour.  This is why we created the window with a background colour. Choose a colour that will not occur within the actually window that you want preserved. | |
Step 5: | Show the completed window and wait for the button to be pressed. | |
Complete program below: | ||
| ||