How to Create a .NET Button (Program)
Starting with PxPlus 2025, a .NET Interface was added to PxPlus that enables the creation of .NET objects in your application.
For this example, you will be creating a .NET button control in a program. You will be adding various button properties (i.e. color and text) and creating an event when the button is pressed using the new interface.
Properties and Event of the .NET Button
A .NET button is associated with various properties that allow you to customize its appearance and behavior. For this tutorial, you will be shown just a few of the many possibilities that are available when using properties.
This table lists the properties and event for the .NET button you will be creating.
| Object/Property | Description |
|---|---|
| BackColor | Background color of the button. |
| Enabled | Makes the button available for use or disables it so that it cannot be used. |
| ForeColor | Color of the button text. |
| Visible | Hides or shows the button. |
| Image | Adds an image to the button. |
| Text | Adds text to the button. |
| Event | Description |
| Click | Event triggered by a button click. |
How to Define the Main Object for the .NET Button
On the Command line, define a Button object.
Syntax:
def object net_button,@(20,20,18,2.8),"[.NET]System.Windows.Forms,System.Windows.Forms.Button"
How to Add Text to the .NET Button
These steps show you how to add text to the .NET button.
For this example, you will be adding the text "Save" to the button.
1. | To add text to the button, enter the syntax below. Syntax: net_button'text$="Save" |
2. | Ensure that the button is enabled. Syntax: net_button'Enabled=1 |
3. | Ensure that the button is visible. Syntax: net_button'Visible=1 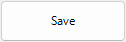 |
How to Set the Background Color for the Button
These steps show you how to add a background color to the button.
1. | You need to define a Color object to change the appearance of the button. Syntax: def object color,"[.NET]System.Drawing,System.Drawing.Color" |
2. | Set BackColor$ for the background color of the button. For this example, the background color will be LemonChiffon. The PvxHandle$ property is used for assigning or passing in a .NET object to a .NET object constructor, property or method. Syntax: net_button'BackColor$=color'LemonChiffon'pvxhandle$ 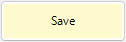 |
How to Set the Color of the Button Text
To set colors, you also have the option to use RGB colors.
For this example, you will be using the RGB code for the color Crimson, which is RGB: 220 20 60.
Syntax:
net_button'ForeColor$= color'FromArgb(220,20,60)'pvxhandle$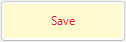
How to Add an Image to the .NET Button
These steps show you how to add an image to the .NET button.
1. | Define another object called img. This image object (img) will allow the placement of an image. Syntax: def object img,"[.NET]System.Drawing,System.Drawing.Image" |
2. | Create a variable to hold the path to the image file using the PTH() function. For this example, the variable name is image_path$. The path will be dependent on the location of the image you will be using. Syntax: image_path$=pth("*plus\inomads\sysimage\checkmark.png") |
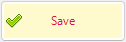
3. | The FromFile object will look for the specified image location. The Image will default to the center of the text. In the next set of steps, you will be changing the alignment. Syntax: net_button'Image$=img'FromFile(image_path$)'pvxhandle$ 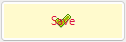 |
How to Align an Image on the .NET Button
These steps show you how to align an image on the .NET button.
1. | Define another object called ContentAlignment. This object will allow the alignment of an image. The default is centered. Syntax: def object imgalign,"[.NET]System.Drawing,System.Drawing.ContentAlignment" |
2. | For this example, you will be applying a Left alignment. Use the property called MiddleLeft. Syntax: net_button'ImageAlign$=imgalign'MiddleLeft'pvxhandle$ |
3. | Before going any further, enter START on the Command line to drop all objects. |
How to Create a Program to Run
To create this button programmatically, you will need to create a program to run.
For this example, you will be creating and naming the program: dotnet_button
1. | Copy and paste the following lines of code into a program to be executed. |
2. | Save the program as "dotnet_button". |
3. | Run the program. |
4. | The button will display on the screen. The program will wait for input, at the WHILE/WEND loop, until the dialog is exited via the X (Close button) in the top right corner. |
How to Set an Event
Events are functions of the button that will be performed when the user clicks the button.
How to Set an Event to Show a Message Box
These steps show you how to set an event to show a message box when the user clicks the Save button.
1. | Load the dotnet_button program and insert these lines prior to the WHILE/WEND loop: Syntax: |
2. | Save the program. |
3. | Create an object program for the main program to invoke with the lines of code shown below. This program must be called ClickEvent.pvc and be saved in the same directory as the main program. Insert these lines: |
4. | Save and close the program. |
5. | To test this event, reload and run the dotnet_button program. |
6. | When the button is clicked, the following message box displays: 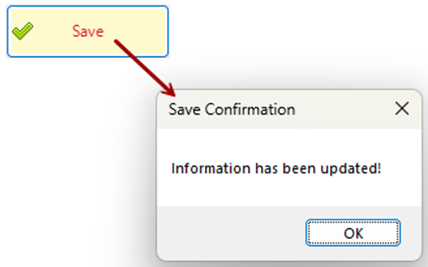 |
PxPlus Program .NET Button (dotnet_button)
After completing this tutorial example, you should have a working program similar to the one below:
! dotnet_button - .Net button programmatically
!
! Create and initialize a Button
def object net_button,@(20,20,18,2.8),"[.NET]System.Windows.Forms,System.Windows.Forms.Button"
!
! Define the object for Color
def object color,"[.NET]System.Drawing,System.Drawing.Color"
net_button'BackColor$=color'LemonChiffon'pvxhandle$ ! Set the color of the background
net_button'ForeColor$= color'FromArgb(220,20,60)'Pvxhandle$ ! Add color of the text
!
! Button properties
net_button'Text$="Save" ! Add text on the button
net_button'Enabled=1 ! Enable Net_BSave'Enabled=0 ! Disable
net_button'Visible=1 ! Visible Net_BSave'Visible=0 ! Hide
!
def object img,"[.NET]System.Drawing,System.Drawing.Image" ! Add an image to the button
def object imgalign,"[.NET]System.Drawing,System.Drawing.ContentAlignment" ! Align an image
image_path$=PTH("*plus\inomads\sysimage\checkmark.png")
net_button'Image$=img'FromFile(image_path$)'pvxhandle$
net_button'ImageAlign$=imgalign'MiddleLeft'pvxhandle$ ! Re-align to the left of the text
!
! Set the button to return a message box when clicked
     Click=new("ClickEvent")
     on event from Net_Button process Click
!
! Wait for user to click the button
while 1
obtain (0,siz=1)'ME',*,'MN'
if ctl=-1999 \
then break ! If user closes the dialog using the 'X' top right corner
wend
!
! Clean up the object
drop object color,err=*next
drop object img,err=*next
drop object imgalign,err=*next
drop object Click,err=*next
drop object net_button,err=*next
!
endPxPlus ClickEvent Object Program (ClickEvent.pvc)
def class "ClickEvent"
      function Click(sender,evtArgs)Click for event "Click"
      end def

!
Click:
      enter sender,evtArgs
      msgbox "Information has been updated!","Save Confirmation"
return See Also
.NET Interface
How To Tutorials (for .NET Interface)
DEF OBJECT Define Windows Object
ON EVENT Event Processing