How to Create a Webster+ Web Page Using a Text File
This tutorial explains how to create the Webster+ Web page shown below using short codes saved in a simple text file. Sample code is provided, followed by a line-by-line explanation.
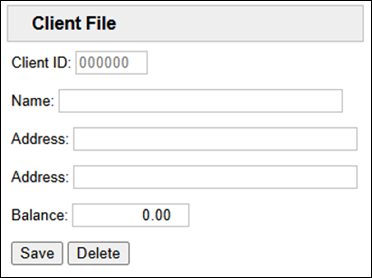
Create the text file as follows:
1. | Open a text editor, such as Notepad. |
2. | Copy and paste the following code: [ttl]Client File[/ttl] |
3. | Save this as a .txt file (e.g. HowTo.txt). |
Code Explanation
This table explains each line of the above code:
Line | Description |
|---|---|
[ttl]Client File[/ttl] | The [ttl]…[/ttl] short code sets the window or screen title to "Client File". If no HTML <title> tag exists on the page, the first [ttl] contents will be used. The contents of the short code will be displayed using the HTML class of 'fm_ttl', which by default is bold, larger (120%) font in a gray rectangle. |
[form program=MyProg] | The [form] short code defines the beginning of the form container. When the form data is submitted, it will be passed to the specified program. The short code option [program=MyProg] defines the specified program, which can be a string variable or a quoted value. |
Client ID: | "Client ID:" is the label. This label, along with the other prompts or labels below, could also have used the [show] short code and could have been entered in the format [show "Client ID:"]. |
[input ClientID$ format="000000" tip="Enter Client #" event=FindClient] | The [input var…] short code inserts an input field. The value of var specifies the related variable to receive and set the current value of the input. The short code option format="000000" enforces a 6-digit numeric input (leading zeros likely applied). The short code option tip="Enter Client #" provides a Help tooltip. The short code option event=FindClient triggers a lookup action when the user completes this field (e.g. presses Enter) to load the client's data. |
Name: | "Name:" and "Address:" are the labels. |
[input Name$ len=30] | The [input var…] short code inserts an input field. The short code option len=## sets the maximum length on the input to ## characters. |
Balance: | "Balance:" is the label. |
[input Balance format="-###,##0.00"] | The [input var…] short code inserts an input field. The short code option format="-###,##0.00" defines the displayed format for a currency or decimal value, including negative signs, thousands separators (comma), and exactly two decimal places. |
[button event=Save text="Save"] | The short code option event=Save triggers the Save function in the MyProg program, typically writing the form data to a database. The event=Delete triggers the Delete function in the MyProg program, removing the current client's record. |
[/form] | The [/form] short code defines the end of the form container. |
Display in Webster+ (*obj/webbind Logic)
Webster+ can refer to this text file in the same manner as an HTML page. The URL can set pg $ equal to the text file name (e.g. pg$=HowTo.txt), as shown below. You can also define a link in Webster+ Setup with an Action of Webpage and an Associated Name of the text file name (e.g. HowTo.txt).
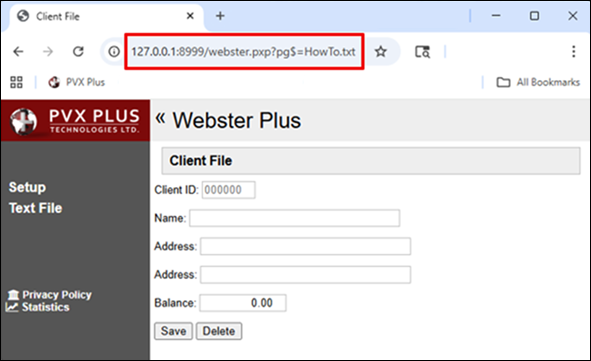
The *obj/webbind logic will automatically add this template in the "page Contents" section at run time.
<!DOCTYPE html>
<html lang="en">
<head>
<title>Client File</title> (webbind converts [ttl]Client File[/ttl])
</head>
<body>…
<div id="pageContents"><div><p>
… (the text file is inserted here)
</body>
</html>
See Also
Short Codes
Short Code Options
Webster+ HTML Merge/Bind Object