How to Enable Two-Factor Authentication (2FA)
Two-Factor Authentication (2FA) adds a second layer of security by requiring users to verify their identity with a one-time code sent by email, text message, or an authenticator app when logging in.
Before You Begin
NOMADS security classifications and users must be set up.
At least one user must be assigned to the ADMIN classification.
See Security Setup.
Enabling Two-Factor Authentication
To enable Two-Factor Authentication system wide:
1. | From the IDE Main Launcher, expand the Security category and select User Definitions. |
2. | The Sign On window opens. Log in as a user assigned to the ADMIN classification. |
3. | The User Maintenance window opens. Click the Two-Factor Authentication Setup button. 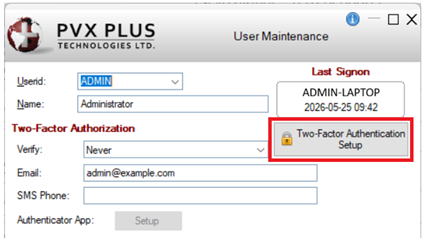 |
4. | The Setup Two-Factor Authentication window opens. 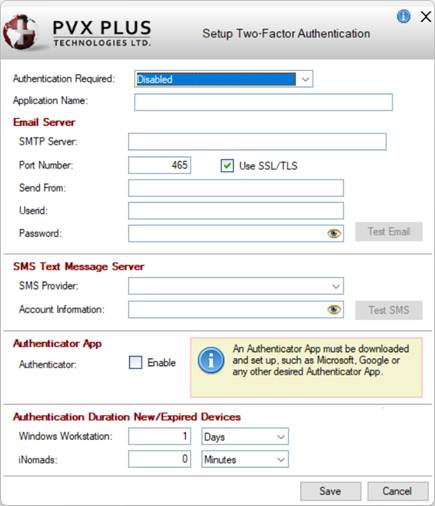 |
5. | From the Authentication Required drop box, select how Two-Factor Authentication applies to users: Mandatory: Authentication is enforced for all users. 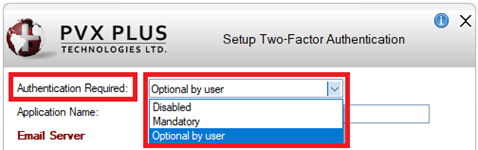 |
6. | In the Application Name field, enter the application name that will appear in verification emails or texts sent to the user. 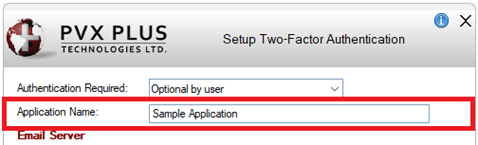 |
Steps 7, 8 and 9 explain how to set up email, SMS, and authenticator app verification. Set up only the verification method(s) required for your system.
7. | To enable email verification: In the Email Server section, enter the settings for the email server that will send verification emails. Once the settings are entered, click the Test Email button to send a test email and confirm the settings are working. If the test is unsuccessful, make any necessary changes and resend the test email. 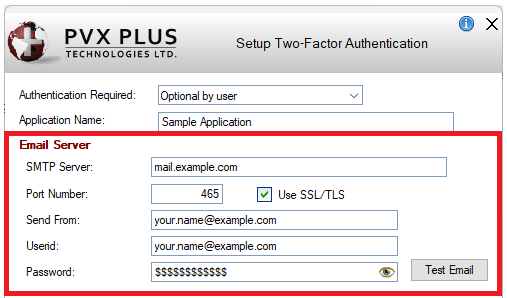 |
8. | To enable SMS verification: In the SMS Text Message Server section, enter the settings for the SMS text message server that will send verification text messages. Once the settings are entered, click the Test SMS button to send a test text message and confirm the settings are working. If the test is unsuccessful, make any necessary changes and resend the test SMS. 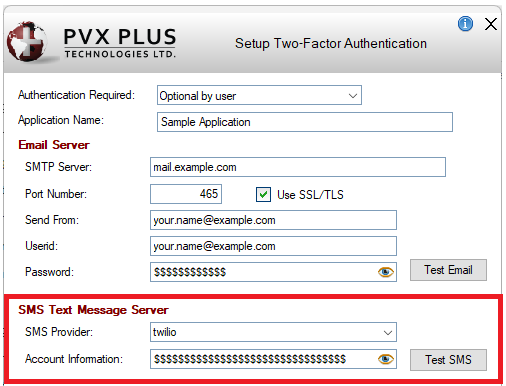 |
9. | To allow authenticator app verification: In the Authenticator App section, select the Enable check box. This allows individual users to later set up their preferred authenticator app for verification. 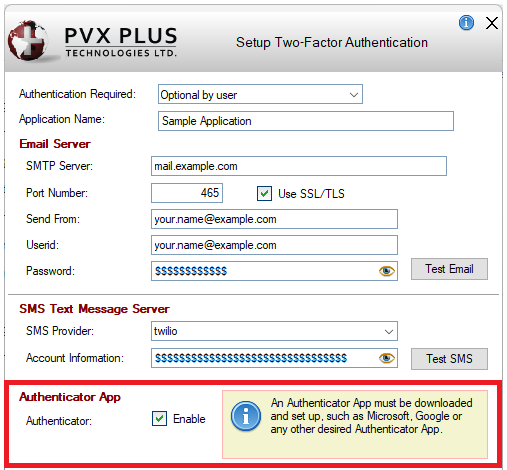 |
10. | In the Authentication Duration New/Expired Devices section, specify (if needed) how long a device remains trusted before prompting for Two-Factor Authentication again. 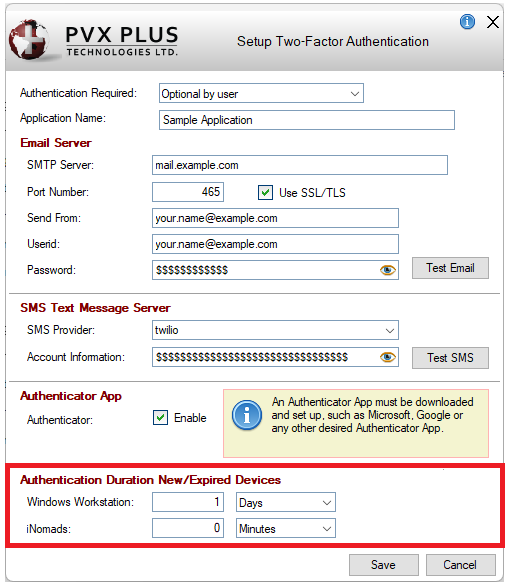 |
11. | Click the Save button to save these settings. |
12. | You are returned to the User Maintenance window. Two-Factor Authentication is now enabled on the system. |
The next step is to set up the verification method(s) for individual users.
See Also
Two-Factor Authentication Setup
How to Set Up 2FA Email Verification
How to Set Up 2FA SMS Verification
How to Set Up 2FA Authenticator App Verification