How to Set Up Email for Two-Factor Authentication
Two-Factor Authentication (2FA) adds a second layer of security by requiring users to verify their identity with a one-time code sent by email when logging into PxPlus. With email verification, a randomly generated six-digit code is sent to the user's email address at sign in.
Before You Begin
Two-Factor Authentication must be enabled on your system. See How to Enable Two-Factor Authentication (2FA).
Setting Up Email Verification for Individual Users
To set up email verification:
1. | From the IDE Main Launcher, expand the Security category and select User Definitions. |
2. | The Sign On window opens. Log in as a user assigned to the ADMIN classification. |
3. | The User Maintenance window opens. From the Userid drop box, select the user for whom email verification will be enabled. |
4. | In the Two-Factor Authorization section, use the Verify drop box to select how often Two-Factor Authentication is required for this user: |
5. | In the Email field, enter the user's email address. The window looks similar to the one below: 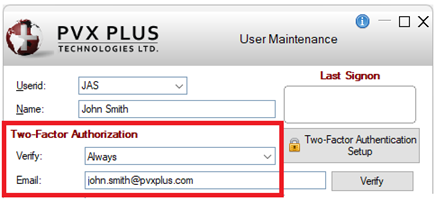 |
6. | Click the Verify button beside the Email field. |
7. | A verification email containing a six-digit code is sent to the user's specified email address. |
8. | In the Two-Factor Verification window, enter the code and click Verify to confirm the email address. 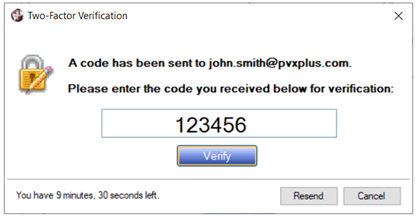 |
9. | Once email verification is successful, the Verify button (beside the Email field) is replaced with the text "Verified". |
10. | Click the Save button to save the user settings. |
The next time the user signs in, the user enters the code sent to his/her email address. See Login Process with Two-Factor Authentication.
See Also
Two-Factor Authentication Setup
How to Enable Two-Factor Authentication (2FA)
How to Set Up 2FA SMS Verification
How to Set Up 2FA Authenticator App Verification